The first time I tasted a cherry tomato I had grown myself, warm from the vine and split with sweetness, I understood why gardeners become obsessed. However, what I didn’t fully appreciate then was how much of that flavor depends on the soil.
Over time, I learned that fertilizing is the difference between a plant that survives and one that truly thrives.
I’ve been growing cherry tomatoes for over fifteen years, both in raised beds and clay-heavy garden borders, as well as in blistering summers and cooler coastal seasons.
Along the way, I’ve killed plants with too much nitrogen and watched blossom-end rot ruin entire crops. Because of this, after years of trial and error, I finally developed a fertilizing approach that consistently delivers abundant, flavorful fruit.
This is the guide.
Let me be direct: there is no single best fertilizer for cherry tomatoes that works universally. However, there are solid principles and a handful of methods that consistently perform better than others. In this guide, I’ll share both.
Why Cherry Tomatoes Are Fertilizer-Hungry Plants
Cherry tomatoes are, botanically speaking, greedy.
Their small size is deceptive; these plants grow fast, fruit prolifically, and draw heavily on soil nutrients throughout a long season.
A single indeterminate plant can produce several hundred fruits over three or four months. That kind of output demands consistent nutritional support.
The three macronutrients — nitrogen (N), phosphorus (P), and potassium (K), each play a distinct role, and the ratio in which you supply them changes as the plant moves through its life cycle. Getting this wrong is the most common mistake I see.
| Nutrient | Role in Cherry Tomatoes | Deficiency Signs |
|---|---|---|
| Nitrogen (N) | Drives leafy, vegetative growth and overall vigor | Yellowing older leaves, stunted growth |
| Phosphorus (P) | Root development, flowering, fruit set | Purple-tinged leaves, poor flowering |
| Potassium (K) | Fruit quality, disease resistance, sugar content | Brown leaf edges, weak stems, bland fruit |
| Calcium (Ca) | Cell wall integrity, prevents blossom-end rot | Dark, sunken patches on fruit bottoms |
| Magnesium (Mg) | Chlorophyll production, photosynthesis | Interveinal yellowing on older leaves |
The Two-Phase Feeding Strategy
Here’s the framework I use, and the one I recommend to every gardener who asks me about cherry tomatoes. I divide the season into two clear phases, each with different fertilizer needs.
Phase 1: Vegetative Growth
From transplanting until the first flowers appear. During this stage, plants need more nitrogen to build strong stems and roots.
Phase 2: Fruiting
Once flowers appear, the plant needs less nitrogen and more potassium to support fruit growth and improve flavor.
Throughout: Calcium
In addition, calcium must be available at all times. Without it, blossom-end rot can quickly appear, especially with uneven watering.
However, one major mistake I made early on was continuing high-nitrogen feeding after flowering. As a result, the plants grew large and green but produced very little fruit. Nitrogen pushes leaf growth, while potassium supports fruiting. Therefore, timing matters.
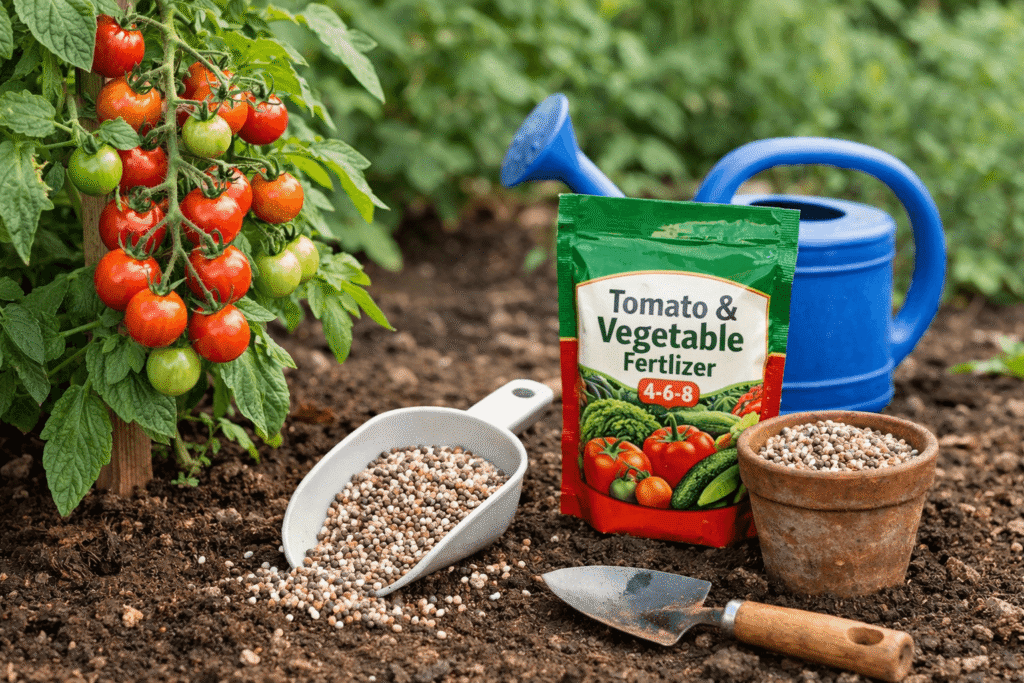
The Best Fertilizers I’ve Actually Used
1. Slow-Release Granular: Osmocote Plus (15-9-12)
For gardeners who want a largely hands-off approach, Osmocote Plus is the most reliable granular fertilizer I’ve found for cherry tomatoes. You mix it into the planting hole at transplanting, and the coated granules release nutrients gradually over four to six months in response to soil temperature. It’s not glamorous — but it works.
The 15-9-12 ratio is well-suited to the vegetative phase, and because the release slows down as the season progresses, it doesn’t dramatically overfeed nitrogen during fruiting. I still supplement with a potassium-heavy liquid feed during heavy fruiting, but for busy gardeners or those growing in containers, Osmocote takes most of the guesswork away.
2. Liquid Feed: Tomato-Focused Formulas (e.g., 4-18-38 during fruiting)
Once my plants are in full flower, I switch to a liquid concentrate formulated specifically for fruiting. These high-potassium, low-nitrogen formulas — often sold as “tomato feed” or “bloom booster” — are applied weekly through the fruiting season. The liquid delivery means nutrients are available almost immediately.
I’ve used several brands over the years, but what matters more than the brand is the NPK ratio. For fruiting cherry tomatoes, I target something in the range of 4-18-38 or similar — very low nitrogen, high phosphorus to sustain flowering, and high potassium for fruit quality. This is where flavor is built.
My Single Most Impactful Change Switching from a balanced fertilizer to a high-potassium fruiting formula once flowering began improved both yield and flavor more than any other single change I made. The fruits were measurably sweeter — this isn’t marketing language, it’s measurable as brix content — and the plants carried more fruit to full ripeness without dropping.
3. Organic Option: Fish & Seaweed Emulsion
For gardeners committed to organic methods, fish and seaweed emulsion is the most complete organic liquid feed available. It’s not as precisely calibrated as synthetic formulas, but it delivers a wide range of trace minerals and growth-promoting compounds that synthetic feeds lack. In my experience, plants fed with seaweed extract show better stress tolerance — useful during heat waves or periods of inconsistent watering.
The smell is genuinely awful. Apply it outside, water it in, and forgive yourself for the neighbors you’ve bothered. It’s worth it.
4. Calcium Supplements: Crushed Eggshells & Foliar Sprays
Blossom-end rot devastated my first container crop of cherry tomatoes. I lost about forty percent of the fruit that year — small, blackened patches on the base, appearing right as the tomatoes approached ripeness. It looked like disease. It wasn’t. It was calcium deficiency combined with inconsistent watering.
I now add crushed eggshells to every planting hole and use a liquid calcium foliar spray at two-week intervals once fruiting begins. For containers especially — where soil dries unevenly and calcium can be depleted quickly — this is non-negotiable. A simple calcium-magnesium supplement (often sold as “Cal-Mag”) dissolved in water works extremely well.
Expert Tip
Don’t confuse calcium deficiency with drought stress — they look similar and often occur together. If you see blossom-end rot, water more consistently before adding more calcium. Irregular soil moisture is usually the trigger that prevents calcium uptake, even when it’s present in the soil.
Fertilizing in Containers vs. In-Ground
Container-grown cherry tomatoes need more frequent feeding than in-ground plants — full stop. Every time you water a container, nutrients leach out through the drainage holes. I feed my container plants every seven to ten days with a liquid formula; in-ground plants every two weeks is typically sufficient.
Containers also dry out faster, which exacerbates calcium uptake issues. If you’re growing on a balcony or patio, use a pot that is at minimum twelve inches in diameter — ideally eighteen or larger — and never let the soil dry out completely between waterings. This single habit prevents more problems than any fertilizer.
Common Fertilizing Mistakes: And How to Avoid Them
Over-fertilizing with nitrogen: More is not better. Excess nitrogen produces enormous, beautiful plants with almost no fruit. If your cherry tomato plant looks spectacular and isn’t setting fruit, reduce nitrogen immediately.
Fertilizing dry soil: Always water before and after applying any fertilizer, granular or liquid. Fertilizer applied to dry roots causes chemical burn that appears as scorched, brown leaf edges within days.
Ignoring soil pH: Even the best fertilizer is useless if your soil pH is wrong. Cherry tomatoes prefer a pH between 6.0 and 6.8. Outside this range, nutrients become chemically unavailable regardless of how much you apply. Test your soil before planting, every season.
Stopping fertilization too early: I see this constantly. Gardeners fertilize enthusiastically at the start, then stop once fruit appears, assuming the job is done. An indeterminate cherry tomato plant continues flowering and setting new fruit for months. Keep feeding until the plant genuinely winds down.
A Simple Feeding Schedule to Follow
For gardeners who prefer a concrete plan over principles, here is what I follow each season:
At planting: Mix slow-release granules into the planting hole. Add crushed eggshells or a scoop of garden lime if your soil is acidic.
Weeks 1–4 (vegetative): Apply a balanced liquid feed (e.g., 10-10-10) every two weeks. Focus on consistent watering to establish roots.
First flowers appear: Switch to a high-potassium liquid feed. Reduce or eliminate additional nitrogen.
Fruiting season (ongoing): Feed with high-potassium formula weekly. Add calcium-magnesium supplement every two weeks. Watch for any deficiency signs and address quickly.
Late season: As temperatures drop and fruiting slows, reduce feeding frequency. Let the plant finish naturally.
The Takeaway
After fifteen years of growing cherry tomatoes, I’ve come to think of fertilizing less as chemistry and more as conversation — you watch the plant, you respond to what it tells you, and you adjust. No fertilizer replaces observation.
Start with a slow-release granular at planting, shift to a high-potassium liquid feed once flowering begins, and never neglect calcium. Beyond that, the most important thing you can do is keep the soil consistently moist and test your pH. Get those foundations right, and almost any reasonable fertilizer will give you more cherry tomatoes than you know what to do with.
That first warm, sun-split cherry tomato from your own plant is worth every bit of the effort.
Elena Marsh
Horticulturist and kitchen gardener with 15+ years growing tomatoes across raised beds, containers, and open borders. She writes about practical soil nutrition and seasonal growing for home gardeners.