
Best Metal Raised Garden Bed for Vegetables: What I Wish I Knew Before Buying Mine
A season by season account of what actually holds up outdoors, and what I would do differently.
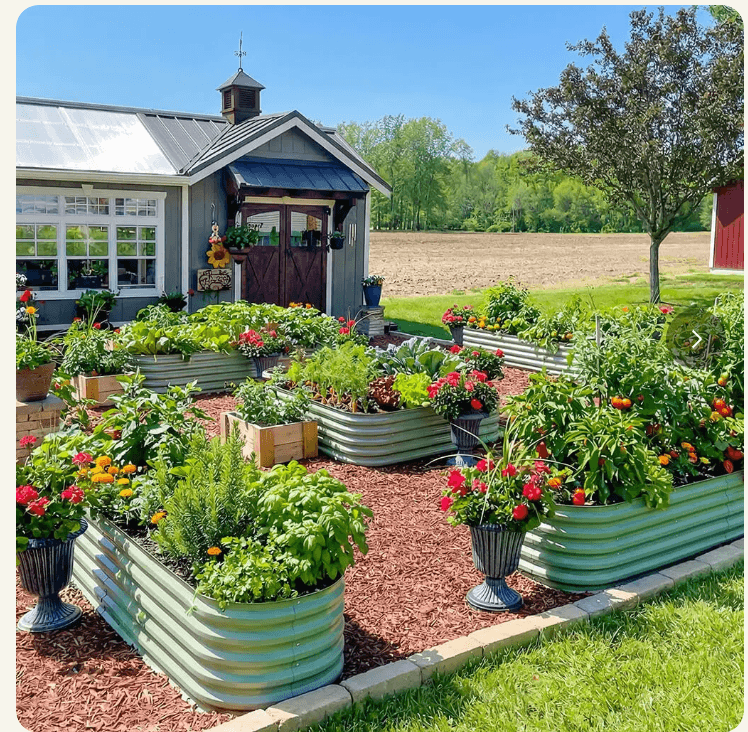
Key Takeaways
- My first cheap metal bed rusted through at the corner seam in under a year. The coating and gauge matter more than the brand name on the box.
- Look for Zn-Al-Mg coated or G90 galvanized steel with welded or folded corners, not screwed flat panels.
- Go 17 inches or taller for tomatoes, carrots, and anything with deep roots. My 11 inch bed stalled by midsummer.
- Metal does not overheat roots the way people assume, as long as you mulch the inside edge and skip planting directly against the wall.
- Soil to fill the bed usually costs more than the bed itself. Budget for both before you buy.
My first metal raised bed rusted through at the corner seam after eight months.
Not because metal beds are bad. Because I bought the cheapest one I found without checking the coating or the gauge of steel.
That mistake cost me a bed full of half grown tomatoes and about 60 dollars down the drain.
So if you are looking for the best metal raised garden bed for vegetables, I am going to walk you through everything I learned the hard way, plus what actually works, based on three seasons of growing in these things.
Why I Switched From Wood To Metal In The First Place
I started with cedar raised beds like everyone recommends.
They looked great for exactly two years.
Then the bottom boards started going soft, ants moved in under the frame, and one corner post just snapped when I leaned on it to pull a weed.
That was enough for me.
A friend who runs a small market garden told me she had been using galvanized steel beds for five years with zero rot, zero pest issues, and barely any maintenance.
I was skeptical about heat. Everyone says metal cooks plant roots in summer. So I tested it myself before recommending anything to anyone.
Does Metal Actually Overheat Plant Roots?
Short answer: not as much as people think, if you fill it properly.
I put a soil thermometer six inches down in my galvanized bed during a 95 degree July afternoon in full sun.
The soil at that depth was warmer than my wood bed, but only by about 3 to 4 degrees.
The real heat problem is at the very edge of the metal wall, in the top two inches of soil.
Roots that are deep enough do not really feel it once the bed is established and mulched.
What Actually Makes A Metal Raised Bed Good (Not Just Shiny)
This is where most buying guides get lazy. They just say get galvanized steel and move on. Here is what actually matters.
1. The Coating, Not Just The Metal
Galvanized steel means it has a zinc coating over the steel to stop rust. But there are different thicknesses of galvanizing, and cheap imported beds often have a thin coating that wears through fast, especially at cut edges and seams.
Look for beds that specifically mention G90 or G60 galvanization rating, or beds coated with Zn-Al-Mg or Galvalume, which hold up noticeably longer against rust in wet climates.
My rusted bed never listed any rating at all. That should have been a red flag.
2. Metal Thickness (Gauge)
Lower gauge number means thicker metal. Sounds backwards but that is how it works.
Anything above 26 gauge is thin and will dent if a kid leans on it or a wheelbarrow bumps it.
I look for 20 to 22 gauge steel now. It costs more but it does not warp when the soil freezes and expands in winter.
3. Corner Construction
This is the part nobody talks about, and it is the part that failed on my first bed.
Beds with folded or welded corners hold up far better than beds that just screw two flat panels together at a 90 degree angle.
Screwed corners are exactly where water sits and rust starts first, which is exactly what happened to me.
4. Height For Actual Vegetable Roots
This one is practical, not cosmetic.
For anything with deep roots like tomatoes, carrots, or potatoes, go with at least 17 to 24 inches of height. If you plan on growing potatoes in yours, it is worth reading how feeding potatoes with 13-13-13 fertilizer actually plays out once tubers start forming, since depth and feeding schedule work together.
I made the mistake of buying an 11 inch bed for my first tomatoes. The roots hit the native clay soil underneath by mid July and growth basically stalled.
A taller bed also means less bending over, which matters more than people admit once you are weeding at 6am before work. If you want a second opinion on exact depth requirements, the UC Master Gardener guide on raised beds for tomatoes lines up with what I found through trial and error.
My Pick For The Height And Coating This Guide Recommends
If you want something that checks every box above without guessing on gauge and coating quality yourself, this is the one I point people toward.
Vegega 17″ Tall 8x2ft Modular Raised Garden Bed
| Material | Zn-Al-Mg coated steel |
| Height | 17 inches |
| Footprint | 8ft x 2ft |
| Bottom | Open bottom for drainage |
| Corners | Folded panel joints with bracing rods |
What I Like
- 17 inch depth handles tomatoes, carrots, and potatoes without roots hitting bottom
- Zn-Al-Mg coating is a step up from basic galvanized, matters if you get heavy rain
- 8x2ft size is their most reviewed configuration, easier to gauge real world durability
- Open bottom design avoids the waterlogging issue I had with a solid tray bed
Watch Out For
- Assembly takes two people if you are doing the full 8ft run in one sitting
- Empty and unfilled, it can tip in strong wind. Fill it the same day you assemble it
- Bracing rods need to be tightened again after the first heavy watering
Step By Step: How I Set Mine Up (So You Do Not Repeat My Mistakes)
- Pick a flat spot with at least 6 hours of direct sun. I learned this after placing one bed too close to a fence that shaded it from 2pm onward. Growth was noticeably slower on that side.
- Level the ground before assembly. Even a slight slope means water pools on one side and the metal panel bows outward over time.
- Line the bottom with landscape fabric, not solid plastic. You want drainage but you want to block grass and weeds from growing up through the bottom.
- Fill using the layered method, not straight garden soil. I use roughly 60 percent quality garden soil, 30 percent compost, and 10 percent perlite or coarse sand for drainage. If this is a brand new bed with unknown soil fertility, my experience with using 13-13-13 fertilizer on a new garden bed is worth a look before you plant anything. For the science behind why nutrient needs differ so much crop to crop, the University of Maryland Extension guide to fertilizing vegetable gardens is one of the clearer breakdowns I have found.
- Water deeply right after filling. This settles the soil so you are not adding extra bags two weeks later when everything sinks by several inches.
- Add mulch immediately, even before planting. Bare metal walls with bare soil next to them dry out fast in direct sun.
Common Mistakes People Make (I Made Half Of These)
Buying based on price alone. The cheapest bed on a marketplace listing is almost always the thinnest gauge with the weakest coating. You will replace it within two seasons.
Ignoring drainage holes. Some cheaper kits do not include pre drilled drainage holes. If yours does not have any, drill a few yourself before filling it, or you will end up with root rot after heavy rain.
Planting too close to the metal wall. Covered above, but it is worth repeating because it is the single most common complaint about metal beds cooking plants.
Skipping a liner in very hot climates. If you are in a zone that regularly hits 95 plus for weeks at a time, a thin liner along the inside walls adds an extra buffer against heat transfer and rust from the inside out.
Not securing tall beds against wind. A 24 inch empty bed before filling can actually tip in strong wind. I had one blow over before I filled it.
What It Actually Costs (Realistic Numbers)
Based on what I have bought and what I have seen reliable brands charge:
- Small kit (3×3 feet, 12 inch height, decent gauge steel): 60 to 100 dollars
- Standard kit (4×8 feet, 17 inch height, G90 galvanized): 150 to 250 dollars
- Modular or oval style (deeper, thicker gauge, better corners): 200 to 400 dollars
- Soil to fill a 4×8 bed at 17 inches deep: roughly 15 to 20 cubic feet of mix, usually 80 to 150 dollars depending on bagged versus bulk delivered
People underestimate the soil cost every time. The bed itself is often the smaller half of your total spend. Once it is filled and planted, the Virginia Tech Extension guide on fertilizing the vegetable garden is a solid reference for getting the feeding schedule right without wasting fertilizer.
Advanced Tips Most Guides Skip
Metal vs Wood vs Composite: Quick Comparison
| Factor | Metal (galvanized) | Wood (cedar/pine) | Composite/plastic |
|---|---|---|---|
| Lifespan | 10-20+ years with good coating | 3-8 years depending on wood | 5-10 years |
| Heat retention | Slightly higher at edges only | Neutral | Neutral |
| Pest resistance | Excellent | Moderate, attracts some insects | Good |
| Upfront cost | Medium to high | Low to medium | Medium |
| Maintenance | Almost none if coated properly | Needs resealing or replacing boards | Low |
| Assembly | Bolt together, usually quick | Varies, sometimes needs tools | Usually snap fit |
For anyone who wants to set it up once and not deal with rot or replacement boards every few years, metal wins on long term value even though it costs more upfront.
FAQ
Yes, as long as it is galvanized or coated to prevent rust flaking into the soil. Avoid uncoated or painted beds where the paint is not specifically rated food safe.
Not if it has a proper galvanized coating, such as G90 or Zn-Al-Mg, and welded or folded corners instead of exposed screwed seams.
17 to 24 inches works well for most vegetables including tomatoes, peppers, and root crops. Anything shorter limits deep rooted plants.
Not always, but a liner along the inside walls helps in very hot climates or if you are growing directly against the metal.
Yes, galvanized steel handles freezing temperatures fine. Just make sure drainage holes are not blocked so water is not sitting and freezing inside the bed.
The Bottom Line
The best metal raised garden bed for vegetables is not the cheapest one on the first page of search results.
It is the one with a real galvanized rating, thicker gauge steel, welded or folded corners, and enough height for whatever you actually plan to grow.
I paid for that lesson once with a rusted out bed and a lost tomato harvest. You do not have to.
Check the coating, check the gauge, check the corners, and fill it properly. Do that and it will genuinely outlast every wood bed you have ever built.