
Best 4×8 Raised Garden Bed for Vegetables: Depth, Layout, and Real Costs
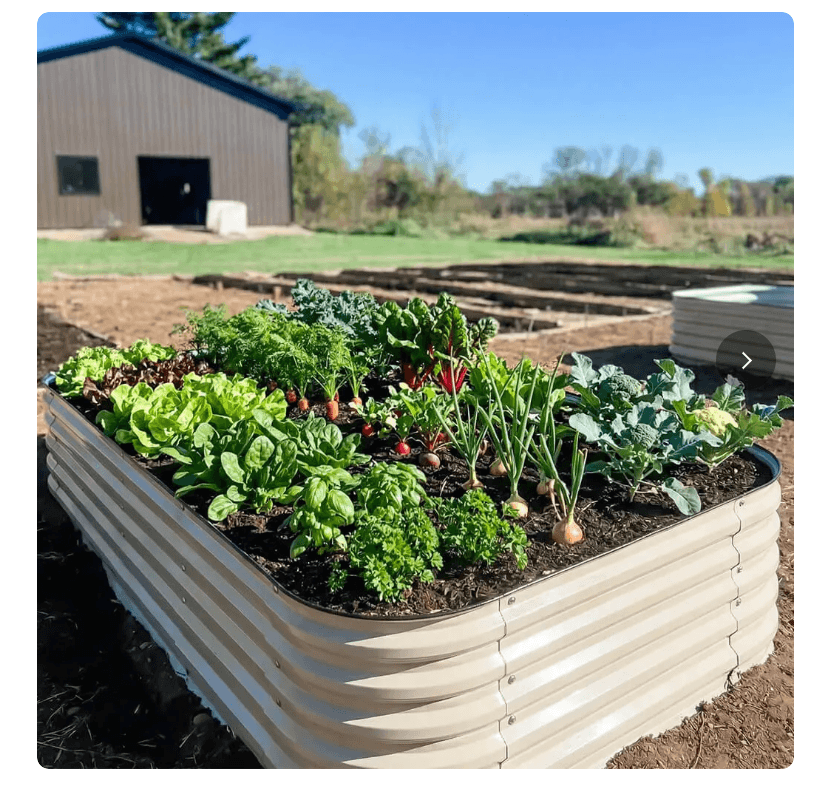
My first 4×8 bed sat half empty for three weeks after I built it, because I could not decide what went where. I had done the math on square footage. I had not done any math on reach, on sun angle, or on how fast a tomato plant swallows everything next to it. By August that bed was a jungle on one side and bare dirt on the other.
A 4×8 raised garden bed is the size most vegetable gardeners land on eventually, and there is a real reason for that. Thirty two square feet is enough to grow actual food, not just a token tomato and a pot of basil, but it is still small enough to manage on evenings and weekends without turning into a second job. The size is not the hard part. Getting the depth, the layout, and the setup right so that those 32 square feet produce instead of turning into an overgrown mess, that is the part almost nobody explains clearly.
This guide covers what I wish someone had told me before I filled mine: how deep to go depending on what you want to grow, which 4×8 kits are actually worth the money, how to lay the bed out so nothing shades or crowds out its neighbor, and what it really costs once soil gets added in. If bending and kneeling are the bigger issue for you, our raised garden bed guide for back pain covers that angle in more depth.
Quick Picks — Best 4×8 Raised Garden Beds for Vegetables
Why 4×8 Is the Size Most Vegetable Gardeners Choose
There is a practical reason 4×8 shows up so often as the default recommendation. Four feet is close to the limit of how far most people can comfortably reach without stepping into the bed, so if you can walk around it, every inch of a 4 foot width stays within reach from one side or the other. Eight feet is long enough to feel like a real garden, but still short enough that you can cross it in a couple of steps while watering or checking for pests.
Go wider than 4 feet and you start leaning over the middle to weed it, which gets old fast. Go much longer than 8 feet in one piece and the bed gets awkward to build, ship, and move once it is full. 4×8 is the sweet spot where the math works out on both sides.
How Much Food Actually Comes Out of 32 Square Feet
It depends enormously on what you plant and how you space it, but gardeners often use a rough rule of thumb of about a pound of harvest per square foot over a full season from a well tended bed. That puts a 4×8 bed somewhere in the range of 30 to 40 pounds of produce in a typical year, and a lot more than that if you are growing prolific crops like zucchini, cherry tomatoes, or pole beans that keep producing right up to frost.
That number swings hard based on spacing and succession planting. A bed planted once in spring and left alone will fall well short of it. A bed where you pull spent lettuce in June and immediately drop in bush beans will beat it by a wide margin.
Picking the Right Depth for What You Actually Want to Grow
Depth is where most first time vegetable gardeners guess wrong, usually by going too shallow because a taller bed costs more and the difference does not seem like it should matter that much. It matters more than almost anything else about the bed.
According to University of Maryland Extension, raised beds need at least 8 inches of soil for leafy greens, beans, and cucumbers, and 12 to 24 inches for peppers, tomatoes, and squash. Root crops like carrots and potatoes generally want to be at the deeper end of that range too, since a shallow bed forces their roots to fork or stop growing once they hit the bottom.
The two real depth options for a 4×8 metal kit are 17 inches and 32 inches, and the difference is not just about inches on a tape measure.
17 inches comfortably covers lettuce, spinach, herbs, peppers, bush beans, and cucumbers. Tomatoes and squash will grow in it too, especially if the bed sits on grass or dirt where roots can keep going into the native soil below. It gets tighter for full size carrots and potatoes, which do better with more room to stretch straight down.
32 inches removes the guesswork. Tomatoes, squash, full size carrots, and potatoes all get the depth University of Maryland Extension recommends, with room to spare. It also happens to sit at a height where you are not bending at the waist to weed or harvest, which after a full season of gardening is a real, if secondary, benefit. If potatoes are part of the plan, depth is only half the equation; our guide to using 13-13-13 fertilizer for potatoes covers the feeding schedule that actually affects tuber size.
The Best 4×8 Raised Garden Beds for Vegetables, Compared
1. Vegega 17″ Tall 4×8 Metal Raised Garden Bed (10-in-1)
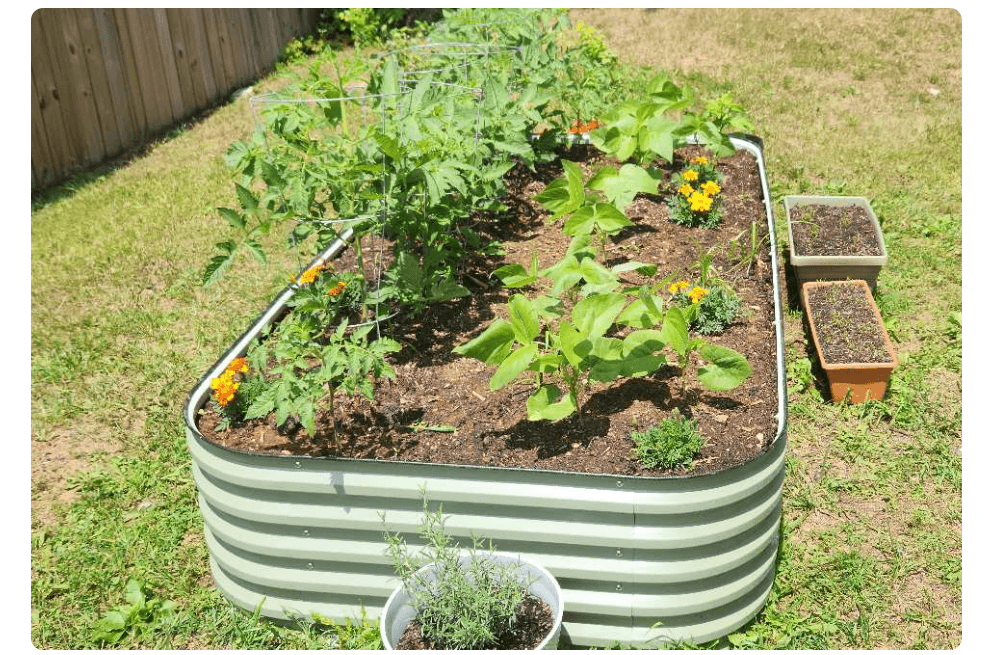
| Height | 17 inches |
| Footprint | 8 ft x 4 ft (reconfigures to 10×2, 7×5, or 6.5×5.5) |
| Material | 0.6mm Zn-Al-Mg steel |
| Empty weight | 45.1 lbs |
| Assembly time | About 50 minutes |
| Price | $199.95 |
This is the depth that covers almost everything a beginner vegetable garden actually needs, at a price that does not make you nervous about committing to your first raised bed. The 10-in-1 panel system means the same parts can be reconfigured into other shapes later, so if this spot does not work out you are not stuck with an 8 foot rectangle forever.
Reviewers who bought both the 17 inch and 32 inch versions in the same order consistently mention the 17 inch kit is noticeably easier to lift and position alone, which matters if you are setting this up without help.
Pros
- Covers greens, herbs, peppers, beans, and cucumbers with room to spare
- Lighter kit, easier to carry and position solo
- Costs less to fill since it holds roughly 40 percent less soil than the 32 inch version
- Reconfigures into 10 different shapes if your layout changes
Cons
- Tight for full size carrots and potatoes unless it sits on grass or dirt
- Still requires bending to reach the bottom of the bed
- Open bottom, so it needs native soil below for deep rooted crops to do well
2. Vegega 32″ Tall 4×8 Metal Raised Garden Bed (10-in-1)
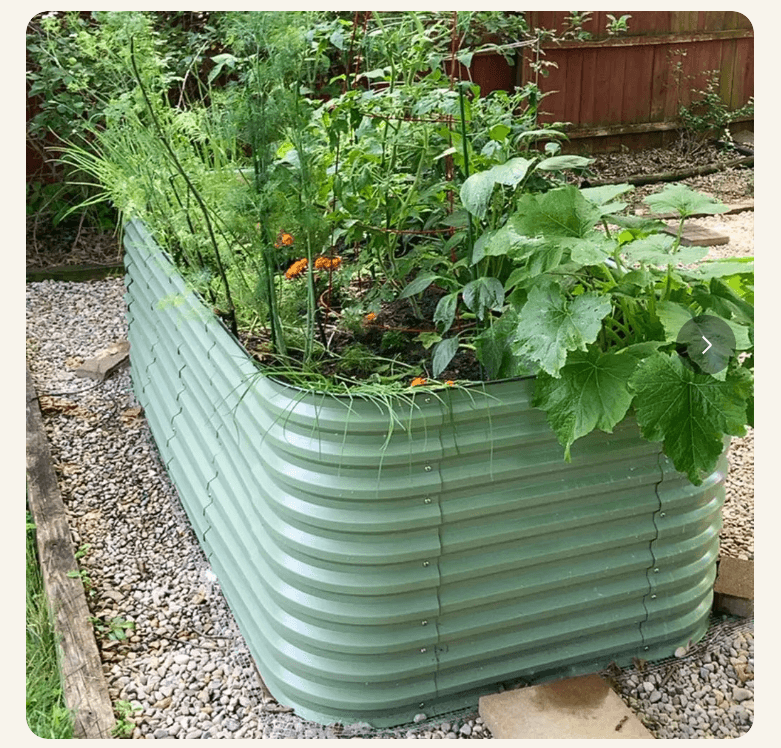
| Height | 32 inches |
| Footprint | 8 ft x 4 ft (reconfigures to 10×2, 7×5, or 6.5×5.5) |
| Material | 0.6mm Zn-Al-Mg steel |
| Empty weight | 73.55 lbs |
| Assembly time | About 70 minutes |
| Price | $339.95 |
This is the depth that stops the guessing. Every crop in the University of Maryland depth chart fits comfortably, including full size carrots and potatoes, and it works fine even sitting on concrete or a patio where an open bottom bed usually struggles. The extra height also means far less bending over a full growing season, which adds up more than people expect once June turns into August.
It is a genuinely heavy kit even before soil goes in, at nearly double the weight of the 17 inch version, so plan on a second set of hands for assembly.
Pros
- Full depth for tomatoes, squash, carrots, and potatoes, no compromises
- Works on concrete or pavers, not just grass or dirt
- Waist height removes most bending for weeding and harvest
- Same reconfigurable 10-in-1 panel system as the 17 inch version
Cons
- Costs roughly 70 percent more to fill with soil than the 17 inch bed
- 73.55 lbs empty, heavier to unload and assemble
- Overkill if your garden is mostly greens, herbs, and peppers
Planning the Layout: What Goes Where in a 4×8 Bed
Thirty two square feet feels like a lot of room until you actually start placing plants, and then it fills up fast. A simple way to plan it out is to mentally divide the bed into 32 one foot squares, four across and eight down, and assign each square or small group of squares to one crop based on its mature size, not its seedling size.
- One square per plant: peppers, bush beans, lettuce (one per square), Swiss chard
- Four squares per plant: tomatoes, squash plants that are not being trellised
- Nine squares per plant: sprawling vine crops like melons or pumpkins, unless trellised
- Sixteen per square: radishes, carrots
A few placement rules save you from the mistakes I made the first time around. Put tall crops like tomatoes, trellised beans, and staked peppers on the north side of the bed so they do not shade everything else as the sun moves through the day. Keep fast growing greens like lettuce and spinach on the edges where you will be reaching in most often to harvest. Save the center rows for crops you plant once and leave alone, like tomatoes and peppers, since you will not be disturbing that soil every few days.
If pole beans, cucumbers, or small squash are on your list, put them under an arched trellis instead of letting them sprawl. It turns a crop that would otherwise eat six or eight square feet into one that uses two, and it is one of the easiest ways to get more out of a fixed footprint without buying a second bed. For more on matching crops to soil depth specifically, our raised garden bed guide for tomatoes breaks that down further.
Setting Up Without Wasting Money or Soil
- Choose a spot with 6 to 8 hours of direct sun. Vegetables are less forgiving of shade than flowering plants. A spot that looks bright enough for flowers can still fall short for tomatoes, so watch it for a full day before committing.
- Leave 2 to 3 feet of walking room on both long sides. An 8×4 bed only keeps everything within reach if you can walk around it. Push it against a fence and the far two feet stop being usable without leaning across.
- Level the ground before assembly. An unlevel base puts uneven stress on the panels once soil goes in, and over a season that is how walls start to bow.
- Assemble with a second person. Even the lighter 17 inch kit is awkward for one person to hold square while bolting panels together. The 32 inch kit, at 73.55 lbs empty, is genuinely a two person job.
- Fill with the hugelkultur method to cut soil cost. Layer logs, sticks, and dry leaves in the bottom half of the bed, then top it off with quality garden soil and compost. The buried wood slowly breaks down into nutrient rich soil over a season or two, and you are not paying premium soil prices to fill the bottom half of a 32 inch bed.
- Install every bracing rod that comes with the kit. Wet soil pushes outward on the panels constantly. Skipping even one rod is how a wall starts to bow by midseason.
- Water deeply once filled, then wait about a week before planting. This settles the soil and gives amended soil a chance to start balancing out before roots go in.
Watch It Come Together
Mistakes That Cost You a Harvest
Mistake 1: Planting the Same Day You Fill the Bed
Fresh soil and compost need a little time to settle and start working together before roots go into it. Give it about a week and a deep watering first.
Mistake 2: Underestimating Sun Requirements
A spot that gets dappled shade for part of the day might still look bright, but most fruiting vegetables want a genuine 6 to 8 hours of direct sun. Watch your chosen spot for a full day before you build anything on it.
Mistake 3: Overcrowding Because There Is So Much Room
Thirty two square feet feels spacious when the plants are seedlings. Six weeks later, a tomato planted 8 inches from its neighbor is competing for light, air, and water with everything around it, and that crowding is one of the biggest drivers of fungal disease in a raised bed. Space for the mature size of the plant, not the size it is when you put it in the ground.
Mistake 4: Growing the Same Crop Family in the Same Spot Every Year
Tomatoes, peppers, and eggplant are all in the same plant family and share the same soil borne diseases. Even within one 4×8 bed, rotating which end of the bed each family grows in from year to year keeps those problems from building up in the soil.
Mistake 5: Pushing the Bed Against a Fence
This is the same trap that catches people who buy an 8×4 bed for back pain relief. Without walking room on both long sides, the far two feet of the bed stop being within comfortable reach, and you end up leaning across exactly the way a raised bed is supposed to prevent.
Mistake 6: Hand Watering a Bed This Size All Summer
Thirty two square feet of soil in full sun dries out faster than most people expect, especially in the 32 inch version once it is established. A soaker hose or basic drip line on a timer takes the guesswork out of it and saves a lot of evenings spent standing there with a hose.
What It Actually Costs
Budget approach: The 17 inch bed, filled mostly with the hugelkultur method using logs and yard debris in the bottom half to cut down on purchased soil, fed through the season with a homemade organic liquid fertilizer instead of store bought bottles.
Mid-range approach: The 17 inch bed filled fully with bulk delivered garden soil and compost, plus an arched trellis for vertical crops. This is the setup I would point a first time vegetable gardener toward.
No-compromise approach: The 32 inch bed, filled fully, with a cover system added for pest protection and season extension on both ends.
| Item | Typical Cost |
|---|---|
| 17″ 4×8 raised bed kit | $199.95 |
| 32″ 4×8 raised bed kit | $339.95 |
| Soil and compost, bulk delivered (17″ bed) | $115 to $270 |
| Soil and compost, bulk delivered (32″ bed) | $220 to $510 |
| Optional arched trellis | $219.95 |
| Optional cover system (4×8 size) | $199.95 |
| Realistic total, 17″ bed plus soil only | $315 to $470 |
| Realistic total, 32″ bed plus soil only | $560 to $850 |
Filled and watered, a 4×8 bed is not something you move again. The 17 inch version commonly ends up somewhere around 800 to 1,100 pounds once soil, water, and plants are accounted for. The 32 inch version, with nearly double the soil volume, typically lands closer to 1,600 to 2,000 pounds. Pick the final spot before you fill it, not after.
Advanced Tips Most Guides Skip
Interplant Fast Crops Between Slow Ones
Tomatoes and peppers take weeks to fill out their space. Tuck radishes or a row of lettuce into that gap early in the season. They will be harvested and out of the way before the slower crop needs the room, effectively getting two harvests out of the same square footage.
Trellis Anything That Vines
Cucumbers, pole beans, and even smaller squash varieties will happily climb an arched trellis instead of sprawling across the bed. It is the single easiest way to grow more in the same 32 square feet, and it improves airflow around the leaves, which cuts down on the fungal issues that come with crowding.
Extend the Season on Both Ends
A cover system over a 4×8 bed does two jobs at once. Early in the season it keeps flea beetles and cabbage moths off young transplants before they can establish. Late in the season, the same cover buys you a few extra weeks past the first light frost, which for tomatoes and peppers can be the difference between one more real harvest and none.
Feed It Once the Soil Settles
New soil, especially soil built with the hugelkultur method, needs a nutrient boost once it settles and before the season’s heavy feeders go in. A balanced 13-13-13 fertilizer is a solid way to condition new soil before planting. Once tomatoes are flowering and fruiting, their needs change, which our guide to fertilizing tomatoes in containers covers in more detail, since a filled raised bed behaves a lot like a very large container, closer to what our breakdown of organic versus synthetic fertilizer for potted plants describes than to an open garden row. For an organic liquid option once plants are flowering, our review of FoxFarm Big Bloom covers how it performs on tomatoes and peppers specifically. Calcium is worth watching too, since a shortfall shows up as blossom end rot well before anything looks wrong above ground; our guide to the best calcium sources for plants covers how to stay ahead of it.
Is 4×8 Actually Right for Your Vegetable Garden?
Not always, and it is worth being honest about that before spending the money.
If this is your very first raised bed and you are not sure vegetable gardening is going to stick, a smaller footprint keeps the investment and the workload lower while you find out. A 4×4 bed still gives you 16 square feet to work with, which is genuinely enough for a household that mostly wants fresh herbs, salad greens, and a couple of tomato plants.
On the other end, if you are trying to feed a large household or preserve food for winter, one 4×8 bed will not get you there on its own. Most experienced vegetable gardeners run two or three 4×8 beds side by side rather than building one oversized bed, since it keeps every section within reach and makes crop rotation between beds much easier than rotating within a single one.
Frequently Asked Questions
Two 4×8 beds, roughly 64 square feet total, is a common starting point for a family that wants to meaningfully offset grocery produce, not just supplement it. One 4×8 bed is a solid start but usually needs a second bed added within a year or two.
Not in terms of size, but it is easy to underestimate the upkeep. Start with fewer crop types spaced properly rather than trying to fill every square the first year.
It can sit against a fence, but you lose the ability to reach the far two feet without leaning across. If you want the full reach benefit of the 4 foot width, plan for access on both long sides.
At least 12 inches, ideally 18 to 24 inches. The 32 inch tall version covers this with room to spare, while the 17 inch version works if the bed sits on grass or dirt where roots can continue into the native soil below.
Roughly 38 to 40 cubic feet for the 17 inch version and 72 to 77 cubic feet for the 32 inch version, filling to about 85 to 90 percent of capacity. The hugelkultur method, filling the bottom half with logs and yard debris, cuts the purchased soil volume by close to half.
Yes, and many gardeners do it on purpose. Marigolds, nasturtiums, and other companion flowers along the edges can help with pest deterrence and pollinator activity without taking up much of the bed’s productive center.
The Bottom Line
A 4×8 raised bed gives you enough room to actually feed a household, without becoming more garden than you can manage. Depth is the decision that matters most, far more than color or brand.
Go with the 17 inch bed if your garden leans toward greens, herbs, peppers, and cucumbers, or if the bed will sit over grass or dirt where roots can travel past the walls. Go with the 32 inch bed if tomatoes, squash, carrots, or potatoes are the main reason you are building it, or if the bed will sit on a patio or concrete where there is no soil underneath to fall back on.
Either way, leave room to walk both long sides, fill it with a plan instead of forty trips of bagged soil, and give the soil a week to settle before anything goes in the ground.