
Best Raised Garden Bed for Clay Soil: What Actually Fixes the Drainage
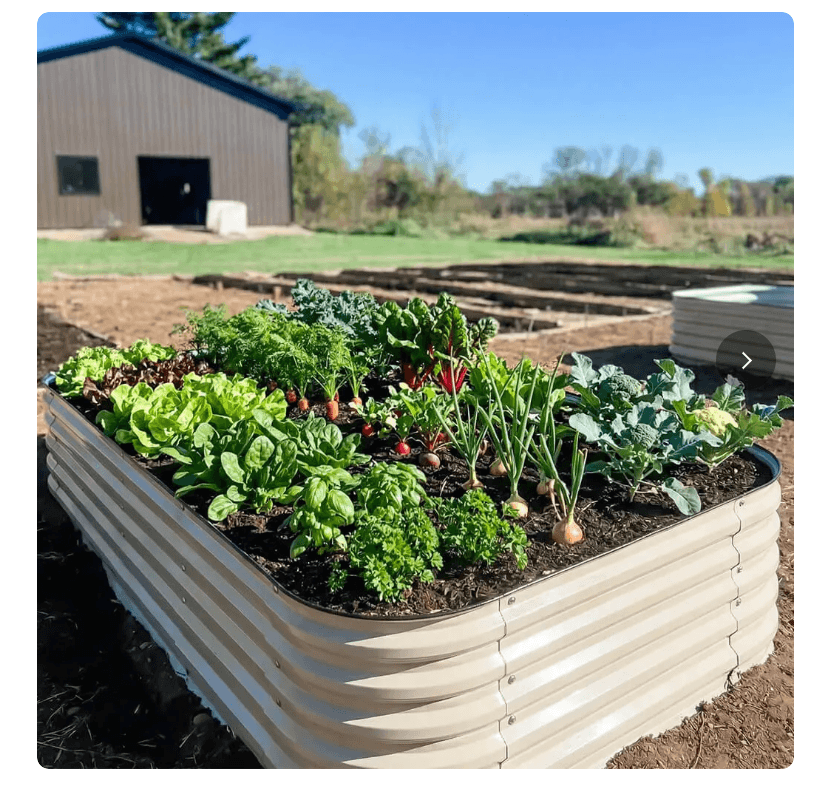
My first raised bed sat directly on top of undisturbed red clay, and for three months after I built it, it worked exactly like a bathtub. Every time it rained, water pooled on the surface and just sat there for days. I had done everything the internet told me to do. I had even put a layer of gravel at the bottom for drainage. That gravel layer was the actual problem.
If you are dealing with heavy clay and looking for the best raised garden bed for clay soil, the bed itself is honestly the easy part. Almost any well built bed will work. What actually decides whether your plants thrive or drown is what happens underneath it and how you fill it, and that is the part most buying guides skip completely.
This is what I got wrong the first time, what actually fixed it, and which beds hold up over years of sitting on ground that barely drains on its own.
Why Clay Soil Practically Requires a Raised Bed
Clay particles are tiny and pack together tightly, which means water moves through clay slowly instead of draining away. Texas A&M AgriLife Extension points to exactly this as one of the main reasons gardeners build raised beds in the first place, since lifting the roots above poor native soil lets you control the growing medium instead of fighting the ground you were handed.
The mistake I made, and the one I see constantly, is assuming a raised bed on its own solves clay soil. It does not. A raised bed just gives you a container of good soil sitting on top of bad soil. What you do at that boundary between the two determines whether the bed drains or drowns.
What Actually Fixes Drainage on Clay Soil, and What Makes It Worse
Skip the Gravel Layer, It Backfires
This is the mistake that cost me an entire growing season. Adding a layer of gravel or rocks at the bottom of a raised bed feels like it should help drainage, but it does the opposite. Water does not move from fine soil into coarse gravel until the soil above is almost completely saturated, a phenomenon soil scientists call a perched water table. A peer reviewed review of the research on this confirms what gardening forums have been saying for years: a coarse layer at the bottom holds more water in the root zone, not less. Skip it entirely. An open bottom sitting on soil you have actually prepared works better than any gravel layer ever will.
Break Up the Clay Underneath, Do Not Just Cap It
The second mistake is filling a bed with good soil and never touching the compacted clay underneath. That undisturbed clay layer acts like the bottom of a tub. Water drains through your nice new soil, hits the clay, and has nowhere to go.
Before filling the bed, break up the top six to ten inches of native clay with a digging fork or broadfork. You are not trying to remove the clay, you are trying to crack it open so water and roots can actually pass through the boundary instead of pooling on top of it. Do this when the clay is on the dry side. Working wet clay just smears and reseals the surface, which undoes the whole point.
If your clay is bad enough that gypsum has helped elsewhere on your property, it is worth working some into that loosened layer too. Our guide to the best calcium sources for plants covers how gypsum helps break up compacted clay structure over a couple of seasons. Once the bed is actually draining, feeding it right matters just as much as the setup did, and our guide to the best fertilizer for plants and flowers gets into how heavy clay changes that approach.
Go Deep Enough That Roots Rarely Need the Clay
Even with the ground broken up below, depth still matters. A shallow bed forces roots to hit that clay boundary sooner, right where drainage is still working hardest to catch up. A deeper bed gives roots more room to develop entirely within soil you control, so the imperfect drainage at the very bottom matters less by the time it becomes a factor. If you are still weighing overall bed dimensions on top of the clay question, our metal raised garden bed guide breaks down which height fits which crops.
The Best Raised Garden Beds for Clay Soil, Compared
1. Vegega 32″ Tall 4×8 Metal Raised Garden Bed
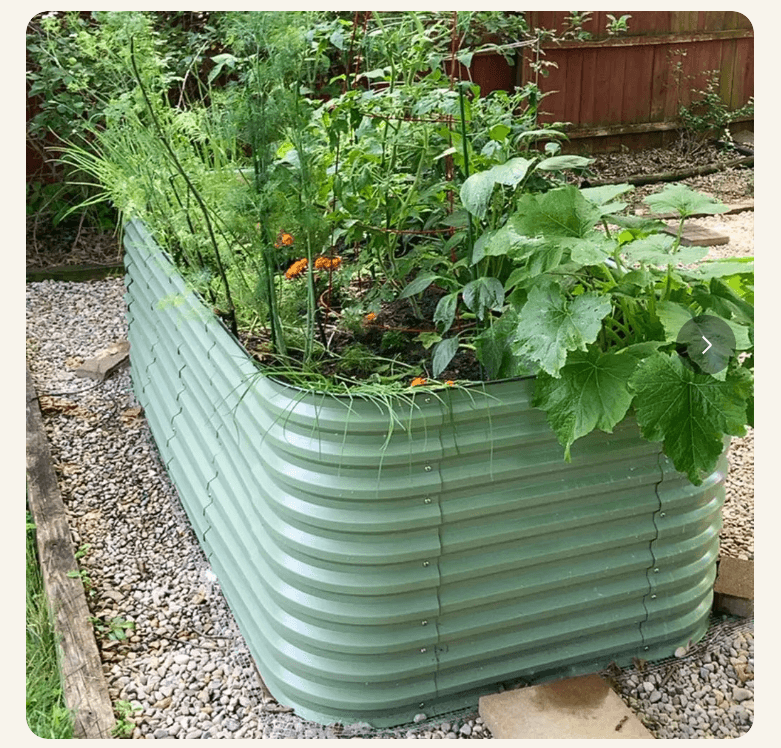
| Height | 32 inches |
| Footprint | 8 ft x 4 ft |
| Material | 0.6mm Zn-Al-Mg steel, open bottom |
| Empty weight | 73.55 lbs |
| Price | $339.95 |
On clay, depth is doing most of the work here. Thirty two inches gives roots enough room to fully establish in amended soil, so the clay underneath, even once loosened, is not something most crops ever need to push through. Steel also does not care that it is sitting against soil that stays damp for days after rain, which is a real concern with wood in the same spot.
Pros
- Deep enough to mostly avoid the clay boundary entirely
- Open bottom, correct for draining into loosened native soil
- Steel will not rot from constant ground moisture the way wood can
Cons
- More soil to buy, which adds cost fast
- Heavy kit, genuinely a two person assembly
2. Vegega 17″ Tall 4×8 Metal Raised Garden Bed
| Height | 17 inches |
| Footprint | 8 ft x 4 ft |
| Material | 0.6mm Zn-Al-Mg steel, open bottom |
| Empty weight | 45.1 lbs |
| Price | $199.95 |
Seventeen inches is workable on clay, but it puts more responsibility on the ground prep step. Skip breaking up the native clay underneath this one and you will likely see standing water after a heavy rain, since roots reach that boundary much sooner than in the 32 inch version.
Pros
- Lower cost, both the bed and the soil to fill it
- Lighter kit, easier to set up alone
Cons
- Only works well on clay if you actually break up the ground underneath first
- Deep rooted crops like tomatoes and potatoes will hit the clay boundary sooner
How to Set Up a Raised Bed on Clay Soil, Step by Step
- Test your drainage before you build anything. Dig a hole about a foot deep, fill it with water, and time how long it takes to drain. Longer than a few hours and you are dealing with genuinely poor draining clay, not just soil that looks heavy.
- Pick a spot that is not the lowest point in the yard. Clay soil already struggles to move water. Placing a bed where runoff collects works against everything else you do.
- Mark the bed footprint and loosen the clay underneath. Six to ten inches deep with a digging fork is enough. Do this on a dry day, not right after rain.
- Do not line the bottom with fabric, cardboard, or plastic. Any solid barrier between the bed and the loosened clay recreates the bathtub effect you are trying to avoid.
- Do not add a gravel or rock layer either. Fill straight from the loosened native soil into a proper raised bed mix.
- Fill with a raised bed soil blend, not straight topsoil or garden soil. A mix of topsoil, compost, and coarse organic matter drains and holds structure far better than garden soil alone, which compacts in a raised bed almost as badly as the clay you are trying to escape.
- Water it in and watch the first heavy rain. This tells you more than any guide can. If water is still standing on the surface a day later, the ground underneath likely needs more loosening or the bed needs more depth.
Mistakes That Turn a Raised Bed Into a Clay Soil Bathtub
Mistake 1: Adding a Gravel Drainage Layer
The instinct makes sense, the science does not back it up. Gravel at the bottom raises the water table inside your bed instead of lowering it.
Mistake 2: Lining the Bottom With Landscape Fabric or Plastic
Any solid barrier between your soil and the native ground blocks the exact drainage path you are counting on. An open bottom on loosened soil is correct, a sealed one is not.
Mistake 3: Never Touching the Clay Underneath
Filling a bed with great soil on top of undisturbed, compacted clay just moves the bathtub up a few inches. Break it up before you fill.
Mistake 4: Working Wet Clay
Digging into clay while it is wet smears the particles together and seals the surface even tighter than before. Wait for a dry stretch before loosening the ground.
Mistake 5: Filling With Straight Garden Soil
Native soil, even good topsoil, tends to compact hard inside the confined space of a raised bed. A proper raised bed mix with compost and coarse organic matter keeps the pore structure open.
Mistake 6: Building Too Shallow for the Crops You Actually Want
A 12 inch bed on clay looks fine until your tomatoes hit the compacted boundary right at the point where drainage is weakest. Match the depth to what you plan to grow, not just to what is cheapest. Our raised garden bed guide for tomatoes covers the depth that crop actually needs, and if potatoes are part of the plan too, our breakdown of 13-13-13 fertilizer for potatoes covers the feeding side once the depth is sorted.
What It Actually Costs
| Item | Typical Cost |
|---|---|
| 17″ 4×8 raised bed kit | $199.95 |
| 32″ 4×8 raised bed kit | $339.95 |
| Soil and compost, bulk delivered (17″ bed) | $115 to $270 |
| Soil and compost, bulk delivered (32″ bed) | $220 to $510 |
| Digging fork or broadfork for breaking up clay | $35 to $80 |
| Bag of gypsum, if your clay needs it | $10 to $20 per 25 lb bag |
| Realistic total, 17″ bed plus soil and prep | $360 to $520 |
| Realistic total, 32″ bed plus soil and prep | $605 to $900 |
The ground prep step barely moves the total cost, a fork and maybe a bag of gypsum, but it is the difference between a bed that drains and one that drowns your plants every time it rains.
Advanced Tips Most Guides Skip
The Squeeze Test Tells You What You Are Actually Dealing With
Grab a handful of moist soil and squeeze it. If it forms a sticky ball that holds its shape, you have clay heavy soil. If it falls apart or will not hold together at all, it leans sandy. This takes ten seconds and tells you more than most soil descriptions on a bag ever will.
A Slight Slope Away From the Bed Helps More Than People Expect
If water pools against the outside walls of the bed after rain, even a gentle grade leading away from the structure keeps that water from backing up into the loosened soil underneath.
Plan for Settling
Beds built over loosened, amended clay tend to settle more in the first year than beds on sand or existing garden soil, simply because the ground underneath is still adjusting. Keep a bag of soil on hand to top off in spring.
When a Raised Bed Alone Will Not Be Enough
Most clay soil problems are fixed with the right depth, loosened ground underneath, and no gravel layer. But if your yard has a genuinely high water table, or there is no low point anywhere on the property for water to drain toward, a raised bed can still stay soggy no matter how well you build it. In that situation a French drain or a rerouted downspout upstream of the bed is doing work that soil prep alone cannot.
Frequently Asked Questions
At least 12 inches if you are breaking up the clay underneath, and closer to 18 to 32 inches if you want most crops to grow entirely within amended soil without depending much on the native ground below.
No, and digging it out entirely can actually create a bathtub if you do not dig deep enough to get through the whole clay layer. Loosening the top six to ten inches with a fork is usually enough.
No. Gravel at the bottom creates a perched water table that holds more moisture in the root zone, not less. Skip it and let the bed sit open bottomed on loosened native soil instead.
Yes, generally. Clay stays damp longer after rain than sandy or loamy soil, and wood in constant contact with damp ground rots faster than wood on well drained soil. Metal beds with an open bottom avoid this issue entirely.
Squeeze a handful of moist soil. If it forms a sticky ball that holds its shape and is slow to fall apart, that is clay. Sandy soil will not hold together at all.
In small amounts, yes, since clay holds nutrients well. But it should never make up more than a small fraction of the fill, and it should be broken up and blended thoroughly rather than added in solid chunks.
The Bottom Line
The best raised garden bed for clay soil is not really about the bed. Almost any well built kit works. What decides whether it thrives or drowns is what happens at the boundary between your new soil and the clay underneath.
Skip the gravel layer, break up the native clay before you fill, and pick a depth that gives roots room to mostly avoid that boundary. Get those three things right and the bed itself becomes the easy part.
It took me one ruined growing season and a bed full of standing water to learn this. Hopefully this saves you that season.